Tuesday, July 29, 2014

Let's Talk About Thread

Beadweaving, by its nature, requires thread as well as beads. But what kind of thread is best? Different beadweaving artists will answer this question different ways. Here’s my take on thread.

Without a doubt, my go-to thread is Nymo D, a multi-filament nylon thread. (“D” refers to the weight of the thread; O, OO, and B are other weights available, all of which are lower test weight than Nymo D). I love that Nymo D allows for a very graceful, unencumbered drape while simultaneously permitting tight tension that can be used to stiffen a piece of beadweaving. I also find it relatively easy to thread onto a beading needle. It comes in a wide range of colors, making it easy to hide thread paths and knots amidst the beads. And, if properly cared for, a piece made with Nymo D will last for years, even with frequent wear.

Other popular brands of multi-filament nylon thread exist. A few other brands worth mentioning are Silamide, Silkon, and C-Lon. I don’t have as much experience with any of these brands as I do with Nymo, but I find Silamide to be far more difficult to thread onto a beading needle than I do Nymo. Silk beading thread is also available, and it’s recommended for use with pearl and gemstone beads, but I have never used silk beading thread and I have never had any problems with using nylon beading thread with pearls or gemstones.

There are, however, characteristics of Nymo (and multi-filament nylon threads in general) that make it less than ideal under certain conditions. It won’t stand up for long against the sharp edges of bugle beads or other beads with sharp edges around their drill-holes. It also doesn’t survive long when exposed to corrosives or chemicals, even ones as mild as hand soap. I avoid wearing jewelry I’ve made with Nymo after I’ve applied sunscreen or lotion, and I make sure my hands are completely dry before handling or wearing pieces made with Nymo. For situations in which I need my work to resist degradation when exposed to water and chemicals, I turn to another popular type of beading thread: Berkley Fireline.

Berkley Fireline is a product manufactured as a fishing line. It’s in a family of fishing lines known as “superlines”, which are formed from multiple filaments “fused” together with a bonding agent. (In the case of Fireline, the filaments are made from extruded polyethylene.) This bonding of multiple filaments makes it possible to achieve a higher test rating with a far smaller diameter when compared to monofilament fishing lines. Since it’s made for use in fishing, Fireline stands up to water and many types of corrosives, and it’s generally held to have a very long life even when left out in the elements. (For a nice discussion of comparative fishing lines, see this article.) Of course, every option has drawbacks, and one of Fireline’s biggest problems is how expensive it is. 128 yards of Nymo D sells for under $4, while 125 yards of 4lb-test Fireline sells for over $17. Due to its high price, Fireline is not the thread to experiment with, nor is it an affordable way to create samples. Repeated disassembly of weaving made with Fireline will wear down the bonding agent, reducing the strength and aesthetic appeal of the thread. And color choices for Fireline are extremely limited. In my experience, the “crystal” Fireline doesn’t disappear into the beads the way you might expect;  it looks white, and against dark beads it can be extremely visible. I also don’t care for the drape achieved with Fireline, which is a big reason why I default to using Nymo D unless I have a specific need for the important features available only with superline threads.

Nylon thread does require stretching prior to use. If it isn’t well-stretched, your beadwork will sag as the tension used in your work stretches the thread in high-tension spots. Fireline doesn’t have much stretch and doesn’t need to be stretched before being used as a beading thread. I’ve also found that it’s usually not necessary to wax Fireline with beeswax or Thread Heaven, but waxing nylon thread makes it so much easier to work with that I do not skip waxing my Nymo thread under any circumstances.

I’ve made a table below to compare the characteristics of Nymo D and Fireline 4lb Test. I hope this will help you select the best thread for the projects you make. Happy beading!


Nymo D
Fireline 4lb Test
Needs to be Stretched
Yes
No
Needs to be Waxed
Yes
No*
Easy to Thread on #12 Beading Needle
Yes
Yes
Available in Many Colors
Yes
No
Water Resistant
No
Yes
Resists Cutting from Sharp Beads
No
Yes
Approximate Price per 100 Yards
$2.15**
$14.40***


*: Many beadweaving artists wax Fireline thread. I don’t, and I don’t think that it’s necessary under typical conditions. However, many people indicate that it makes the thread easier to untangle.
**: Approximate price per 100 yards was calculated using $2.50 as the approximate selling price for 128 yards of Nymo D. See FMG Nymo D.
***: Approximate price per 100 yards was calculated using $18.00 as the approximate selling price for 125 yards. See FMG Fireline 4LB and Berkley Fireline.

Sunday, July 27, 2014

Technique: Making a Beaded Toggle (Photo Tutorial)


There are times when I’ve finished a beautiful piece of beadwoven jewelry and I think, “It would be a shame to put metal findings on this piece, since everything else about it is woven.” Adding a beadwoven toggle clasp to a piece of jewelry can create a sense of continuity that might be missing if metal findings are used to finish a piece that’s otherwise only beads and thread. In my work, I use metal findings and beaded toggles; the choice for each piece usually depends on how I feel about it after the piece is nearly finished and just needs a clasp. You can see my tutorial on adding metal findings to a piece of beadweaving here.

This photo tutorial will demonstrate the techniques I typically use to add a beaded toggle to my work. It’s important to note that adding a beaded toggle requires the artist to be versatile enough to modify their technique to suit the existing beadweaving and the natural variations present in seed beads. A few things to consider:
1. Some beads have small holes that make it difficult to reinforce your thread path if there are already a lot of thread passes through them. Be aware that you may need to change to a smaller needle or alter your thread path to ensure that your toggle is securely attached without breaking any beads while you’re adding it.
2. Seed beads have natural variation, and different types of seed beads have different stringing lengths, so you’ll need to pay attention to how differences in your beads affect your toggle. For example, Czech Preciosa seed beads typically have a much smaller stringing length (parallel to the hole) than do Matsuno Dyna-Mites! seed beads; thus, it may require more seed beads to make a large enough ring if you’re using Czech seed beads than if you’re using Dyna-Mites!. Always check your work to verify that the toggle ring fits the toggle bar while you’re making the pieces, and don’t assume that a bead count that worked last time will work this time, especially if you’re using more than one type of seed bead in your toggle.
3. Some stitches make it difficult to use more than one strand of beads to link the toggle to the work. If you can reinforce a single strand enough that it isn’t likely to break over time, you may find it prudent to only use one strand rather than two.
4. Some pieces of jewelry are heavy enough that your toggle may need to be stiffer than usual to make sure it doesn’t bend and slip out of its ring when the piece is worn. A stiffer toggle can be achieved through tight tension, repeated reinforcement of thread paths, altering your choice of stitch, or even using a form inside the tubular stitch.
5. There are several ways to attach the toggle clasp to the existing beadwork. It is reasonable to tie off your piece, then tie back on in with another thread in order to attach the toggle. This is the method I’ll show you in the tutorial below. However, there are other methods of attaching the clasp (such as using the working threads from the creation of the toggle bar and ring or using the working threads from your work to attach the toggle bar and ring), and your choice of how to attach the toggle to the beadwork may depend on factors idiosyncratic to your design.
6. The ring for your toggle must fit your toggle bar. The fit needs to be snug, but not so snug that it’s difficult to open or close the piece. This may require modifying your bead counts for your toggle ring and will take some practice to get right. See Step 2 below for more detail.

For this technique, you’ll probably want to use beads that match the ones in your piece of jewelry. A beaded toggle can be made with any size of seed beads, or even a combination of sizes. As indicated above, however, it’s usually best to choose beads that have reasonably large holes so that the thread paths can be reinforced repeatedly.

(The beads used in this tutorial are Matsuno Dyna-Mites!. The stitch used for the necklace is a variation of chevron stitch.)

Step 0: Work your piece of jewelry until it’s finished except for adding a clasp. Tie off your working thread and tail securely, but keep in mind that you will need to be able to pass through the beads at the ends of your work several more times in order to anchor the clasp. My tutorial for securely ending thread can be found here.

Step 1: Make the toggle bar.
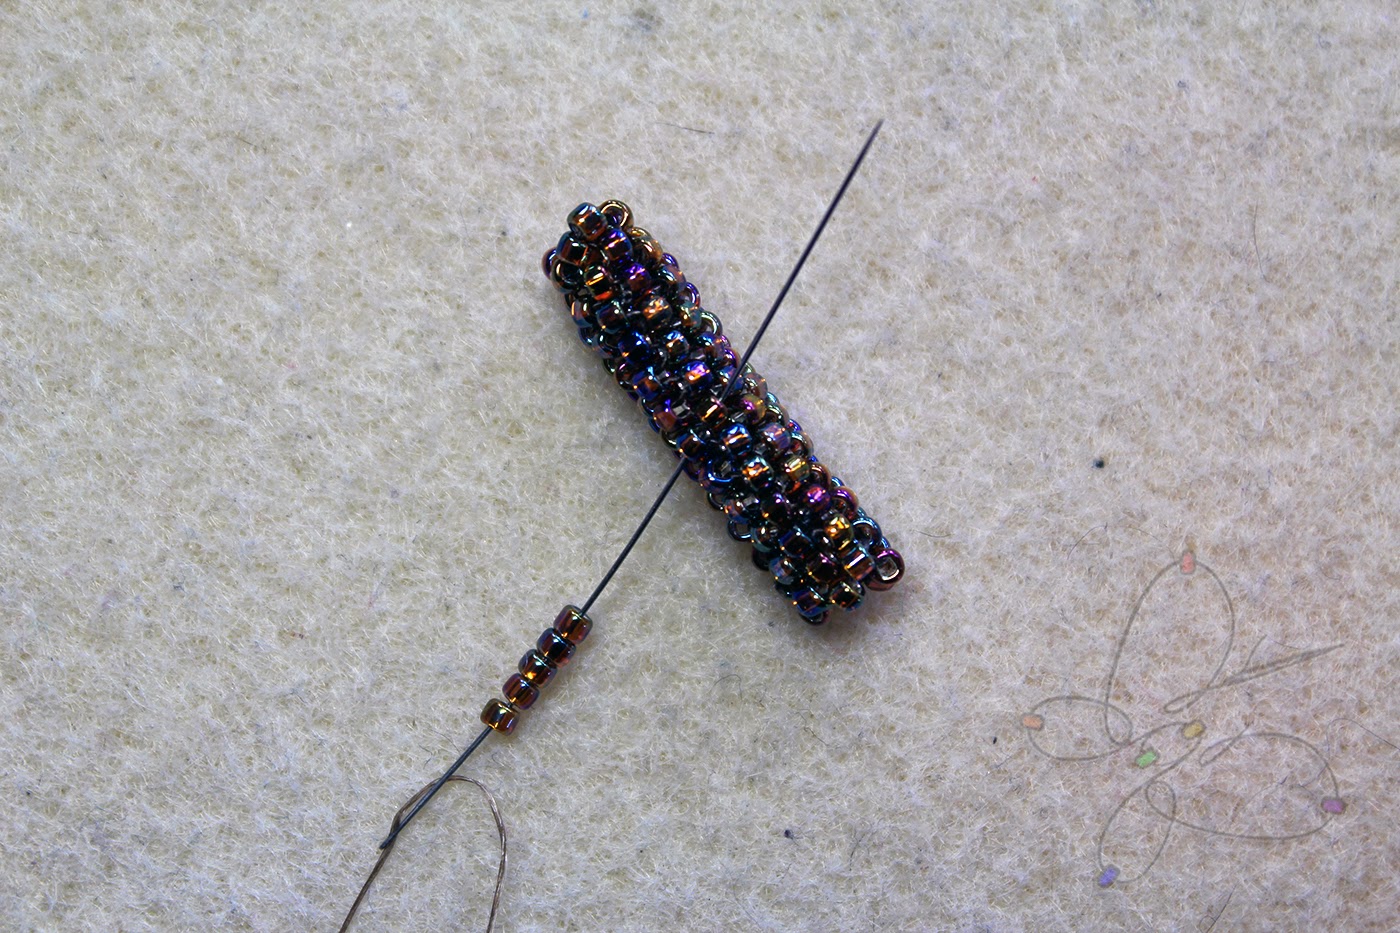
Using a new piece of thread, work a small amount of a tubular stitch in fairly tight tension. I frequently use odd-count tubular peyote (also called spiral peyote) for toggle bars. Other good choices of stitch include tubular herringbone (usually 3 or 4 stacks), even-count tubular peyote, flat peyote “zipped up” into a tube, and Russian rope stitch. Dutch spiral, Russian spiral, and tubular netting can work, but require a lot more reinforcement of the thread paths to reduce their suppleness. If you’re feeling adventurous, some woven accents, such as flowers and shapes, can be used as toggle “bars”, but I recommend becoming comfortable with the basic beaded toggle in this tutorial before attempting designs like these. Tie off your toggle bar as you would any piece of beadweaving (see my tutorial here). For the purposes of this tutorial, I’ll show you how to make a toggle bar from odd-count tubular peyote in size 11/0 seed beads.
Step 1a: Create your initial ring.
Using size 11/0 seed beads, pick up 9 beads. Pass through all of them again. Pass through two or three more beads to create a ring. Pull tight.

Step 1b: Begin to work in tubular peyote stitch.
Pick up 1 bead, skip 1 bead, and pass through the next bead. Repeat three more times. This will bring you to the end of the round. Since this is odd-count peyote, you will not step up at the end of the round. Instead, pick up 1 bead and pass through the first bead added in this step.

Step 1c: Continue to work in tubular peyote stitch for desired length.
Pick up 1 bead and pass through the next “up” bead in the work. Repeat until the piece is approximately 1” long. You’ll want to keep your tension even and fairly tight so that the bar is fairly stiff when finished.

Step 1d: Reinforce as necessary and tie off the toggle bar.
If your toggle bar seems like it isn’t stiff enough to hold its shape in the toggle ring when tugged on, reinforce the bar by following the thread path for the length of the bar, keeping your tension even and fairly tight. Once you’re satisfied that the bar is stiff enough, tie off the working thread and tail (see my tutorial on securely ending thread here).


Step 2: Make the toggle ring.
Make your toggle ring on a new piece of thread. NOTE: Always make your toggle bar BEFORE making your toggle ring. This will allow you to fit the ring to the existing bar, which is far simpler than fitting a bar to an existing ring. Toggle rings can be made with nearly infinite variations in stitch, shape, size, etc. For the purposes of this tutorial, I’ll show you how to make a basic peyote toggle ring that fits the toggle bar created in Step 1.
Note: Depending on the type of beads you’re using, you may need to adjust the number of beads in the initial ring. Just be sure to use an even number of beads. You’ll want the toggle bar to go into the ring easily with a little space to spare, but for the ring to be substantially smaller in inside diameter than the toggle bar is long. See illustration below.

Step 2a: Create your initial ring.
Using size 11/0 seed beads, pick up 26 beads. Pass through all of them again, then pass through two or three more to form a ring.

Step 2b: Peyote around the ring.
Pick up 1 bead, skip 1 bead, and pass through the next bead. Repeat around the ring.
Step 2c: Reinforce and tie off the toggle ring.
Reinforce both the inside ring of beads and the outside peyote beads. It’s important to reinforce the toggle ring very well because it will be subjected to a relatively high amount of force compared to the rest of the piece of jewelry. Tie off the working thread and the tail (see my tutorial on securely ending thread here).

Step 3: Attach the toggle bar to one end of the work.
It’s important to leave some space between your toggle bar and your work. The reason for this is that your toggle bar should be a good bit longer than the inside diameter of your toggle ring, so in order to be able to pull the full length through the toggle ring, there must be some space left between the bar and the piece of jewelry. This is achieved by using anchoring bead strands that are several beads long.
Step 3a: Tie on to the existing beadwork.
Using a new thread, tie on to the existing beadwork, leaving sufficient tail to tie off within your work. (Tying on a new thread after tying off the piece of jewelry ensures that if the threads anchoring your toggle to your work are compromised, it will not cause the rest of the piece of jewelry to fall apart.) Follow the thread path to exit a bead at the location where you wish to attach your toggle bar.
Step 3b: Pick up the first anchor strand and attach it to the toggle bar.

Pick up 5 seed beads. Pass through a bead in the middle of the toggle bar and one bead directly above it.

Step 3c: Add the second anchor strand.
Turn and pass down through the bead on the toggle bar adjacent to the one you’re exiting and the next one directly below it. Pick up 5 seed beads and pass through a nearby bead on the piece of jewelry.

Step 3d: Reinforce and tie off.
Reinforce where your toggle bar attaches to your piece by repeating the same thread paths in Steps 3a, 3b, and 3c at least two more times. Exiting a bead on the piece of jewelry (not on the toggle bar), tie off your working thread; then tie off the remaining tail created from tying onto the work in Step 3a (see my tutorial on securely ending thread here).

Step 4: Attach the toggle ring to the other end of the work.
Step 4a: Tie on to the existing beadwork.
Using a new thread, tie on to the existing beadwork, leaving sufficient tail to tie off within your work. (Tying on a new thread after tying off the piece of jewelry ensures that if the threads anchoring your toggle to your work are compromised, it will not cause the rest of the piece of jewelry to fall apart.) Follow the thread path to exit a bead at the location where you wish to attach your toggle ring.
Step 4b: Pick up the first anchor strand and attach it to the toggle ring.

Pick up 2 seed beads and pass through a seed bead on the outer part of the toggle ring.

Step 4c: Add a bead on the ring.
Exiting the bead on the outer edge of the toggle ring after Step 4a, pick up 1 seed bead and pass through the next “up” bead on the outside of the ring.
 
Step 4d: Add the second anchor strand.
Pick up 2 seed beads and pass through a nearby bead on your piece of jewelry.

Step 4e: Reinforce and tie off.
Reinforce where your toggle ring attaches to your piece by repeating the same thread path in Steps 4a, 4b, 4c, and 4d at least two more times. Exiting a bead on the piece of jewelry (not on the toggle ring), tie off your working thread; then tie off the remaining tail created from tying onto the work in Step 4a (see my tutorial on securely ending thread here).


Beaded toggle closures are a beautiful way to finish a piece of beadwoven jewelry. With practice, you’ll become comfortable enough with creating beaded clasps that you’ll be able to embellish your clasps and even design clasps that double as focal pieces for your jewelry.


Happy beading!

The photos in this tutorial were taken by Perry Gilbert. Thanks a bunch, Perry!

Tuesday, July 22, 2014

Bead Storage!

I own a lot of beads. Seed beads, glass beads, gemstone beads, acrylic beads, shell beads, pearl beads, wooden beads, crystal beads... and that doesn't even cover the stuff that doesn't technically count as "beads"! With so many supplies, tools, and materials, I have to keep my beading stuff organized or I wouldn't be able to find anything when I needed it. It's taken me many years to get my bead stash organized to where I'm happy with it, and I've learned some tricks along the way that might be helpful for other beaders who need to control the chaos.

First, let's address seed beads. Seed beads are one of the most frustrating items to store. They're tiny, so they slip through the cracks at the tops of many containers marketed for bead storage. Furthermore, it's difficult to work with seed beads if they're stored side-by-side in a box that doesn't allow for opening and dumping one compartment without dumping all the others as well. Many of you are already thinking, "Ah-ha! That's why I use modular storage." Modular storage refers to a storage system which uses smaller boxes or containers, several of which then fit into a larger container for easy transport. Modular storage is, in my experience, the best possible way to store seed beads. Containers with separated compartments---such as this one by Craft Mates---can work as well, but I've found it difficult to reorganize my seed bead stash when I keep them in containers like these. Modular storage works best, but when marketed to beaders, it's extremely pricey. So here's my trick: I use modular storage that isn't marketed to beaders! This is the storage system I use. I buy it at Harbor Freight Tools. It's under $6 per box, and each box contains 24 modules. The modules close tightly and do not allow seed beads to slip out the sides---not even 14/0 and 15/0 beads! It's not the sturdiest system out there, but I've been using this system for several years and I have never had to replace a box simply because I wore it out from frequent use, so the lifespan of these boxes is longer than you might expect when you first encounter them. The boxes are clear (though not crystal clear), so I can look through the top, bottom, and sides to find the seed beads I'm looking for without even opening the boxes. And if I need to reorganize my seed beads, it's easy, since I can just remove the modules I need and put them in the boxes I desire. The boxes are stackable and lightweight. The 24 modules leave a little bit of space on the side, which can be used to store tubes or boxes of seed beads, tools, baggies, or other materials. There is no better system for seed beads that falls within a reasonable budget.

Once we move away from seed bead storage, organization tends to be more free-form. Everyone will have a system that works best for them, and systems will vary from beader to beader. I'll discuss what I do and what difficulties I've experienced.

Crystals. As in, Swarovski crystals. I don't use Swarovski as extensively in my work as I used to, due to concerns I have over consistency in cuts and how fragile crystal is (that's an inherent quality, of course, but for how expensive Swarovski can be, I just can't justify creating jewelry with crystals in locations that I know are subject to damage, such as on rings and, in some cases, bracelets). But I do still buy a lot of Swarovski bicones, particularly in 3mm and 4mm sizes, and I use large Rivoli chatons from time to time. It's reasonably safe to keep crystals together in a container, but I found that when I kept them in typical organizers (a single lid for a large number of compartments), I had difficulty removing bicones from their wells without scraping them against the plastic sides of the containers. As a result, finishes (such as Aurora Borealis, or "AB") would scrape off slightly over time, and appeared like very fine glitter on the bottoms and edges of the container wells. This typically wasn't visible on the beads themselves, even though I knew what I was looking for, but it irked me that any amount of damage to these expensive beads was occurring as a result of my storage decisions. I just recently moved all of my crystal beads (Swarovski and otherwise) into the same modular storage system I use for my seed beads. I find that this system works much better for me, because I can simply pour the crystals I need onto my bead mat, rather than pulling them out of the wells of a group storage container. It reduces the likelihood of damage and makes it easier to reorganize and access the crystals.

Glass, acrylic, wooden, shell, pearl, gemstone, etc. For all of these other "accent" beads (by which I merely mean beads which aren't seed beads), I use plastic storage containers with multiple compartments. This box is one of my favorites. It has grooves on the lid over every compartment edge, so beads can't hop between wells, and it's sturdier than a lot of plastic storage I've encountered. The plastic is easy to see through and there aren't protrusions on the top or bottom that make the boxes annoying to stack. The wells are large enough to store most commercially-produced beads and pendants, and the plastic is smooth, reducing the likelihood of damage. The locking mechanism locks tightly.

Pendants, focals, vintage pieces, etc. I love pendants and focals and I get very excited about vintage and vintage-inspired pieces that I can use in my work. I regularly comb thrift stores, flea markets, antique malls, yard sales, and holes-in-the-wall consignment shops for these treasures. Unfortunately, some of them are too large to store in typical bead storage containers. I use clear plastic storage with lids (like you'd find at Wal-Mart, Staples, even Publix---anywhere, really) with baggies, tissue paper, etc, to prevent damage. I also have large, stackable hinged boxes intended for craft storage which have a multi-compartment tray which sits above open-top fixed compartments. These boxes are amazing and, unfortunately, out of production. However, other options of similar concept are available, though I don't have a particular brand or product to recommend in this area.

Findings and chain. I use another of those two-layer hinged boxes (see Pendants, above) for findings and chain. In principle, I keep chain in a multi-compartment box. Findings (jump rings, clasps, earwires, headpins, eyepins, etc) I have sorted into baggies and collected together in a box based on type. A rule of thumb that's really helped me cut down on the bulkiness of my stored findings is that I use the smallest size baggie that will hold the findings I need to store. Baggies frequently hold more volume than they appear to, especially with findings such as jump rings. I use 1"x1" baggies for a lot of my findings storage; one of these tiny little guys can hold well over one hundred 4mm jump rings when packed tightly.

Sterling silver. Sterling silver (92.5% pure silver) oxidizes easily and fairly quickly, so it's frequently recommended that tarnish-inhibiting storage be used for sterling silver. However, it's been my experience that keeping sterling silver in normal, airtight baggies pushed down before closing to minimize the air trapped inside will keep silver reasonably shiny for a fairly long time (over a year). If you access your sterling stash frequently or if you are expecting to store it for a long period, utilizing tarnish inhibitors is probably a very good idea. But if you don't mind a little oxidation (which can be quite beautiful and bring out the detail on a charm or chain) or if you're willing to clean the silver before using it, paying more for special storage isn't really necessary. There are other ways to inhibit tarnish as well.

Everything else. I'm sort of obsessed with plastic storage bins, particularly the ones that are small enough to stack two or three tall on a cabinet shelf and small enough to move easily. I have a countless number of these boxes all over my house, which I get at Wal-Mart for under $1 a box. I use these 6-quart boxes store my beading tools, projects-in-progress, wire, adhesives, baggies, business cards, and pretty much everything else that will fit inside them. I have a few other boxes of varying sizes for specific purposes (such as my displays for shows, which need a larger box). Books and other references are kept on shelves below my beading desk.

A note on bead storage boxes: many bead storage boxes are marketed with "adjustable compartments", such as this one. I don't see these boxes for sale as often as I used to (for a while, I had trouble finding boxes that didn't have adjustable compartments), but they're still around, especially in the lower price range of bead storage containers. I do not recommend ever using a container with adjustable compartments for any type of bead storage. I have tried gluing in the dividers and using tape to make their fit tighter, but it never fails: when I store beads in a container with adjustable dividers, I always find myself sorting beads which managed to get mixed when the dividers failed to stay perfectly in place. It's best just to use containers with fixed compartments, even if they're a little more expensive.

I hope this discussion proves helpful in your eternal quest to organize your bead stash. Happy beading!

Saturday, July 19, 2014

Technique: Cold-Connection Clasps (Photo Tutorial)

Most pieces of jewelry made with beadweaving techniques will require a clasp. There are several techniques I employ for adding clasps to beadwoven jewelry. Today's tutorial will cover one of the simpler methods: cold-connection findings.

One of the biggest concerns about using metal findings in beadweaving is that normal loops and "open" (unsoldered) jump rings will tend to slip off of the thread during wear. To some extent, this can be remedied by making sure your findings go over a strand of beads, rather than having the findings attached over (or very close to) thread. However, this is not always feasible due to variation between stitches, bead sizes, and tension from piece to piece. The techniques I utilize require closed loops and are less dependent on idiosyncrasies of a given piece of jewelry.

(The bracelet used to demonstrate my technique in the photos below is stitched in a variation of Russian lace.)

Step 1:  Work piece until nearly finished and gather tools and materials.
"Closed" (soldered) jump rings are the keystone of the techniques this tutorial will examine. Closed jump rings come in a variety of sizes, gauges, and materials. In the photos in this tutorial, I am using 4mm jump rings made from 20ga silver-plated brass. Chain and open jump rings are also crucial to these techniques, and as such, it's necessary to have appropriate tools with which to work. The photo below labels the tools and materials I will shortly describe.


The descriptions matching the labels are as follows:
   1.  Chain.  This particular chain has open (unsoldered) links. Since this chain will be used as an extension so that the piece is multi-sized, it's important for the chain links to be large enough to accommodate the lobster claw. If your piece is not intended to be adjustable, your chain can be comprised of links smaller than can accept the lobster claw; you'll just need to add a jump ring or chain links which are large enough at the end of the chain.
   2.  Clasp.  This clasp is a lobster claw. Lobster claw clasps tend to be very secure relative to other types of metal clasps, since they operate on a spring and close without a gap once the trigger is released. Other types of metal clasps would be attached in a similar fashion to the method I'll demonstrate here; however, most other types of clasps (such as toggle bars and pearl clasps) will be in two pieces, so you'll need to attach one half to one end of the piece and one half to the other end.
   3.  Closed jump rings.  These are 4mm soldered jump rings made from 20ga silver-plated brass. ("20ga" means 20 gauge, referring to wire thickness measurements.) These soldered rings will be added to the beadwork before tying off. Without an opening for the thread to slip through or to pull apart under pressure, these rings will function as the secure foundation for your metal closure. If you wish for your closed jump ring to be around a strand of beads, rather than against the thread passing through the strand of beads, make sure that you have closed jump rings which are large enough to easily slide over your beads.
   4.  Open jump ring.  This jump ring, also made of silver-plated brass, is not soldered. It can be opened using pliers (the technique for which will be demonstrated below) and will be used to connect the clasp to the soldered jump rings secured inside the weave.
   5.  Pliers.  5a and 5b show two different pairs of "chain-nose" pliers. There are many types of pliers used in making jewelry, several of which have interior surfaces which are flat for gripping and manipulating wire. Never use pliers with "teeth" (ridges inside the jaws of the pliers), as they will mark your wire, leading to a diminished aesthetic and irregular oxidation.
   6.  Wire cutters.  If you are using chain which has soldered links, or if you find it difficult to open and close the links on your chain, you will need wire cutters to clip the chain to the desired length. Wire cutters are also crucial when using headpins and eyepins and when incorporating wire into your design. The thicker and stronger your chain or wire, the more heavy-duty your wire cutters will need to be. Wire cutters typically don't vary much in function, so it's usually safe to buy and use wire cutters sold at hardware stores when making jewelry (unlike with pliers, which typically have teeth when purchased at a hardware store).
   7.  The piece. Usually you'll need to have your woven piece nearly complete before you add cold-connection findings for the closure. However, in some cases, you will find it best to include a closed jump ring at the beginning of your project, especially for projects in stitches that are difficult to extend retroactively from their starting points. This particular piece is stitched in Russian lace, which is easy to extend at its beginning even after the rest of the weave is finished; therefore, I did not include a closed jump ring at the starting point when I began the piece, and will add one to the beadwork before I tie off the tail.

Step 2:  String your final stitch and add the closed jump ring.
Now that you have all of your tools and materials together, you're ready to anchor a closed (soldered) jump ring into the final stitch of your piece. Pick up the beads for your final stitch.


Next, add the closed jump ring. Simply string the jump ring over the needle and slide it down to the beads you just picked up. In the photo below, the red arrow indicates the closed jump ring.


Step 3:  Finish your final stitch.
Maintaining the pattern of the stitch for your piece, complete your final stitch. Please note: For some pieces, you may find it more functional to add a loop that isn't part of your stitch, rather than anchoring the closed jump ring within the final stitch of your piece. This is especially common in pieces made with stitches that pack beads tightly together, such as St Petersburg Chain or flat peyote.


Step 4: Reinforce and tie off your working thread.
Now that the closed jump ring is anchored within your beadweaving, reinforce the bead strand supporting the closed jump ring. Since the jump ring you stitched into your piece will be used to attach the clasp, it will experience some tug while the piece is worn. It will in turn pass this force to the strand of beads which holds it, making this strand more likely to break during normal wear than other parts of the stitch. To mitigate the risk of breakage, reinforce the strand bearing the closed jump ring and the strands connected to it. For a lightweight piece of jewelry, use at least two additional passes (for a total of three thread paths through the strand of beads anchoring the closed jump ring); for a heavier piece, reinforce more thoroughly. Tie off your working thread securely. (For a tutorial on securely ending thread, please refer to my blog post.)

Step 5:  Repeat for the tail.
Refer to Steps 2 - 4 to anchor a closed jump ring to the other end of the piece. Reinforce the strand supporting the closed jump ring and securely end your tail thread.


Step 6:  Attach the clasp using the open jump ring.
Open the unsoldered jump ring using two pairs of pliers. Please note: Never open a jump ring or loop by pulling the joint apart horizontally. Instead, hold the left side of the jump ring with one pair of pliers and grasp the right side of the jump ring with the tips of a second pair of pliers. Pull the right-hand pliers toward you while pushing away with the left-hand pliers to open the ring like a door (see images below). When you close the jump ring, perform the action in reverse to bring the edges of the wire back together.


Open the unsoldered jump ring as above and slide it through the closed jump ring anchored to the beadweaving. Add the lobster claw (or other clasp) and close the jump ring.


Step 7:  Add the chain or other half of the clasp.
Refer to Step 6 to open a link of chain or a second unsoldered jump ring and attach the chain (or the second half of the clasp) to the closed jump ring anchored to the opposite end of the piece. Close the jump ring or link of chain.


The photo below demonstrates the adjustable size of the finished bracelet. Making use of metal findings with chain is one of the easiest ways to ensure that your finished piece is adjustable, which can be an important asset when making jewelry to sell or to give as a gift.


When using metal findings to add a clasp or embellishment to a piece of beadweaving, always consider whether the findings are anchored securely to the beadwork. Using the techniques I've presented in this tutorial will reduce the likelihood that your piece will need to be repaired during its typical lifespan.

If you're adding embellishments to a woven piece via headpins or eyepins, make use of wrapped loops to prevent the connecting loop from sliding over the thread. A tutorial video on making wrapped loops is available here from Fire Mountain Gems and Beads.

Happy beading!

The photos in this tutorial were taken by Perry Gilbert. Thanks a bunch, Perry!